 The Instax Mini 9 is one of the most affordable cameras to use Fujifilm's hugely popular Instax Mini film cartridges - these produce small business card size prints which emerge seconds after taking the photo and self-develop before your eyes within a minute. The Mini 9 is almost identical to the best-selling Mini 8, but adds a small mirror by the lens for framing selfies, is supplied with a close-up adapter lens, and available in five pastel colours. Like other Instax Mini cameras, don't expect 100% accurate framing with the basic viewfinder and beware that prints can often be over-exposed under very bright conditions. If you want instant pictures with accurate framing and guaranteed exposure, then consider Fujifilm's digital Instax SQ10, or their portable Instax printer that'll talk to phones and other cameras. But once you understand what Instax Mini can and cannot do, it's enormous fun. I've not met anyone, young or old, who's not spellbound by a low-cost camera that pumps out instant prints, and it's perfect for events or breaking the ice in street photography. There are more sophisticated and compact models in the Instax Mini range, but I'm fond of the basic charm the Mini 9 inherits from its predecessor. Once again it may not cope with all conditions, but I still believe very home should have one. Refreshingly retro and recommended!
Fujifilm Instax Mini 9 review
-
-
Written by Gordon Laing
Intro
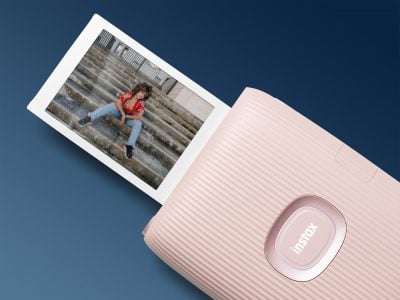
The Instax Mini 9 is the latest low-cost instant camera to use Fujifilm’s enormously popular Instax Mini film. Launched in March 2017 and available in five pastel colours, the Instax Mini 9 produces small, business card sized prints using a fully-analogue process. The prints emerge from the camera almost immediately with the image gradually appearing after around 30 seconds and becoming fully-developed about a minute later.
Like earlier Instax Mini cameras, the Mini 9 is extremely simple. Sharing essentially the same design as the best-selling Mini 8, it’s almost entirely point-and-shoot. All you do is frame the subject using the small optical viewfinder, then turn the ring around the lens to match the conditions indicated by a small light. This controls the aperture on the lens and adjusts the exposure to the conditions. Then just push the button and watch the print emerge out the top.
New to the Mini 9 are a tiny but surprisingly effective selfie mirror by the lens and the inclusion of a clip-on lens accessory for close-ups. As before the camera’s powered by a pair of AA batteries that should be good for around ten film cartridges (or approximately 100 shots), with the built-in flash automatically firing for each one. The five body colours are inspired by actual Pantone swatches: Flamingo Pink (P190C), Ice Blue (P7457C), Cobalt Blue (P660C), Lime Green (P366C) and Smokey White (P428C). I ran a bunch of cartridges through a Mini 9 in fetching Ice Blue for my review here, so read-on to find out if it’s the instant camera you’ve been looking for!

Fujifilm Instax overview
Fujifilm first introduced Instax back in 1998 with the Mini format that’s since become a best-seller. It’s captured the imagination of photographers whether they’re new to instant cameras or fondly reminiscing the Polaroids of their past. In a World where digital imaging has allowed us to capture a vast quantity of photos but rarely print them, there’s something refreshingly unique about a simple, fully analogue camera that outputs a one-off print immediately after pushing the button. And what could be better for sharing than actually handing over an original print? No wonder Instax cameras have become a hit at weddings, holidays and other events.

There’s a variety of Instax Mini cameras available, all of which use the same Instax Mini film cartridges, each containing ten prints. Instax Mini produces instant prints that are the size of a business card, with the actual picture measuring 2.4×1.8in or 62x48mm, leaving a little room on one side for writing a note or caption. Instax Mini film has a sensitivity of 800 ISO and available in (daylight-balanced) colour or black and white cartridges.
[geot][/geot]Depending where you shop, the prints work out about 70 cents or pence each. If you find my reviews useful, you can support me when you buy spare cartrdiges for your Mini camera: [geot country=”US”]Buy the Instax Mini film from amazon.com[/geot][geot region=”UK”]Buy the Instax Mini film from amazon.co.uk[/geot][geot region=”Germany”]Buy the Instax Mini film from amazon.de[/geot][geot region=”France”]Buy the Instax Mini film from amazon.fr[/geot][geot region=”Spain”]Buy the Instax Mini film from amazon.es[/geot][geot country=”Italy”]Buy the Instax Mini film from amazon.it[/geot][geot country=”Canada”]Buy the Instax Mini film from amazon.ca[/geot][geot exclude_region=”UK,Germany, France,Spain” exclude_country=”Italy,Canada,US”]Buy the Instax Mini film from eBay[/geot], B&H, or Adorama.
Instax Mini was later joined by the larger Instax Wide format, delivering much bigger postcard sized prints with an actual picture measuring 2.4×3.9in or 62x99mm. Instax Wide cartridges require a physically larger Instax Wide camera.
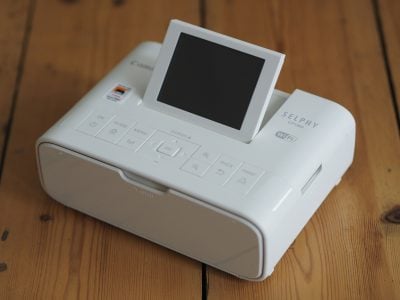
In 2017, Fujifilm introduced a third format, Instax Square, delivering square pictures measuring 2.4×2.4in or 62x62mm, on paper that’s 86x72mm in size. Instax Square cartridges also require a specific camera to accommodate them and at the time of writing this meant using the SQ10 digital / instant hybrid – see my Instax SQ10 review for more details.
PS – looking for film for an old Polaroid camera? Check out The Impossible Project which now produces film for these old models, as well as offering a modern instant camera of its own.
Fujifilm Instax Mini 9 design and controls

Above: The Instax Mini 9 box includes the camera, matching wrist strap, close-up lens accessory and a pair of Alkaline AA batteries that should be good for approximately ten cartridges or 100 shots in total – that’s with the flash firing for every shot as it can’t be disabled.

Above: The Mini 9 measures 116x118x68mm, weighs 307g (without batteries or film), and is available in five colours: Flamingo Pink, Cobalt Blue, Lime Green, Smokey White, and Ice Blue pictured here. The design is essentially the same as the Instax Mini 8 before it, except with the addition of a small selfie mirror to the left side of the lens. When shooting selfies, you should be aware the subject may not be perfectly centred, but the mirror gives you a fair idea.

Above: A selfie composed using the Instax 9 mirror. I framed the shot with my head near the top of the mirror, but in the print, it was positioned more towards the centre. When shooting with most instant cameras, you have to accept the framing, especially at close range, will only be an approximation of what you see in the viewfinder or selfie mirror. The exceptions are models driven by a digital sensor, like the Instax SQ10, which let you frame precisely using a screen on the rear.

Above: The almost featureless rear of the Instax Mini 9, dominated by the door for the film cartridges with a small frame counter to the lower right side and the optical viewfinder to the upper right. The thumb rest and front grip make the chunky body fairly comfortable to hold in this upright orientation, but it feels a little awkward when turned ninety degrees for a landscape / wide shaped shot. To be honest though, the vast majority of your shots are likely to be in the upright / tall / portrait shape.

Above: A small clip at the top of the rear opens the large door to access the film compartment. To load a film, just open the packet, align the yellow strip on the back of the cartridge with the yellow mark on the camera. Then just close the door, after which you’ll notice a mark visible in a small window at the top indicating the presence of a film cartridge within – you mustn’t open the door until the film is finished, or you’ll risk spoiling the remaining shots.

Above: To power-up the Instax Mini 9, just push the button to the lower right of the lens housing as the camera faces you. This extends the lens and opens the cover, ready for action. Here’s the Instax Mini 9 with the lens retracted on the left and extended on the right, ready for action. When you’re finished, just push the lens housing in by hand to switch it off and automatically slide the lens cover back. The lens itself has an actual focal length of 60mm which, with the Instax Mini print size, results in coverage that’s equivalent to 34mm. This delivers a flexible mild wide angle view that’s perfect for selfies, portraits at fairly close range, group shots, landscapes and street scenes.


Above: photos are composed using the optical viewfinder on the rear. It’s quite small, so you’ll need to make sure your eye is square-onto it to see the view, and try to ensure the engraved circle is in the middle of the frame. That said, like other viewfinders of this style, don’t expect the final print to perfectly match what you framed. There will be parallax errors which mean as the subject gets closer, it’ll end up gradually shifted towards the upper right corner. It’s certainly something to be aware of, but the nature and style of instant cameras mean you’re generally much more forgiving of the output. Once again if you demand precision framing, you’ll need a camera with either an SLR viewfinder or a digital sensor and screen.

Above: a small window to the lower right of the film cartridge door indicates the number of shots remaining in the cartridge. If you’ve just loaded a new film, it’ll display ‘S’ for start. You’ll need to power-up the camera and take a shot to eject the protective header strip before you’re able to take your first print. The counter will then start at 10 and count-down to zero.

Above: the Instax Mini 9 uses film cartridges with a fixed sensitivity of 800 ISO and a fixed shutter speed of 1/60. Differences in subject brightness are entirely handled by an opening in the lens with four settings: indoor, cloudy, small Sun and big Sun. These are set using a dial around the lens which effectively adjusts the aperture. For the photographic enthusiasts out there, these four settings effectively set the focal ratio to f12.7 (home icon), f17.9 (cloudy icon), f25.3 (Sun icon) and f32.4 (brightest Sun icon). The camera uses metering sensors to judge the brightness of the scene and make a suggestion of which of the four settings to use by illuminating a lamp next to the icon, but it won’t go as far as to actually set the aperture for you. It’s up to you to accept, ignore or modify the camera’s metering advice by turning the ring to the appropriate icon before you take the shot. This of course opens up the possibility of basic creative exposure control, as turning the dial towards the shade icon lets in more light, making the picture brighter, and turning it towards the Sun icon lets in less light, making the picture darker. Generally speaking though, I found the best results were when you went with the camera’s suggestion.

Above: here’s an example of the four brightness settings on the same subject. In general use, I found these four settings handled most situations from dim interiors to overcast daylight, but very bright conditions could result in over-exposure – see below.

Above: The smallest lens aperture of f32 sounds tiny, but when coupled with a fairly slow fixed shutter speed and fairly high film sensitivity, it still may not be enough to balance an exposure under really bright conditions. In my tests I found the Instax Mini system struggled to avoid over-exposing very bright scenes, particularly when they involved a highly reflective surface like the Sea. As such most of my beach test scenes around Brighton in the UK ended up over-exposed even when the camera was set to its smallest aperture (the maximum Sun icon). Here’s three examples showing conditions where Instax Mini struggled in my tests.

Above: here’s three examples of the same subject, taken on different days from bright and sunny on the left to overcast on the right. The far right shot is the most acceptable, but still looks a little over-exposed. When I first started testing the Instax Mini 9, I wondered if I had a faulty sample, so reshot all my samples with a second model and found exactly the same result. I believe this is a limitation of the Instax Mini format which, as noted earlier, uses a relatively slow fixed shutter speed of 1/60 and a relatively sensitive film speed of 800 ISO. This means the exposure is entirely controlled by those four brightness settings and the bottom line is the smallest aperture of f32 isn’t small enough for the brightest scenes. When shooting the same scene with a traditional camera, I’d typically need a shutter speed of 1/320 at 800 ISO and f32, or a sensitivity of 200 ISO at 1/60 and f32. As it stands though, the combination of 1/60, 800 ISO and f32 is about two stops over-exposed, which roughly corresponds to what I’m seeing on these prints. Bottom line? Avoid shooting in very bright conditions.

Above: a possible solution to shooting in very bright conditions is to place some kind of darkening filter in front of the lens. Here I used my sunglasses as an impromptu neutral density filter in combination with the small Sun exposure setting. It’s clearly flawed, but at least proves you can employ extreme measures if necessary.

Above: overexposure isn’t always a bad thing. It can be used for high-key effects, where a deliberate over-exposure can be used for a creative effect. While most of my bright daylight shots ended up becoming high-key by accident, you can turn the lens ring to the HiKey position to deliberately overexposure compositions in more modest lighting. Above left is a shot that’s normally exposed and on the right one with the HiKey setting. Personally while I welcome additional exposure control, I think the HiKey option should have been located on the shadow end of the ring as it’s dangerously only one click away from the setting you’ll need to use on Sunny days. One click too far and you’ll accidentally over-expose all your bright daylight shots to a point where there might not be anything visible on the print.

Above: the Instax 9 has a built-in flash that fires for every single shot whether it needs it or not. It has an effective range of 0.6 to 2.7m, so won’t affect anything beyond there, but again it’ll fire regardless of the composition, subject and distance. When you power-up the camera, the flash will charge, indicated by a flashing light in the viewfinder. Depending on the condition of your batteries, you’re looking at about half a second to six seconds for a charge, during which you won’t be able to take a photo, so if you’re preparing your friend(s) for a pose, switch the camera on first so it’s not holding you back. In situations where you don’t want the light from the flash, you can of course block some of it with a finger or even tape, but it’ll still need to charge before you can shoot.

Above: the Instax Mini 9 has a lens that effectively has everything focused between around 50cm and infinity. 50cm should be sufficient for a selfie at arm’s length, but for anything closer you’ll want to clip-on the supplied close-up adapter which allows you to shoot between 35 and 50cm. 35cm still isn’t a massive difference from the basic range, but helps you get a little closer to your subject.

Above: here’s some examples taken with the close-up lens attached.
Check prices on the Fujifilm Instax Mini 9 at Amazon, B&H, or Adorama. Alternatively get yourself a copy of my In Camera book or treat me to a coffee! Thanks!